

 This is a subscriber-only article
 It looks like you're browsing in private mode


ONE horse can produce more than eight tons of manure per year. Add to that the 550 litres of urine a horse generates and 365 days of used bedding and you’ve got some serious nutrient potential.
I’m on a mission to turn that into money saving black gold, which hopefully will mean I can feed the soil in my fields and nurture some healthy grass growth.
Both Coolmore and Kildangan Studs are composting their manure and bedding waste on large-scale, on-site, composting operations. On smaller farms, composting can be a practical way to manage your manure heap, creating a source of slow-release nutrients for your fields and paddocks.
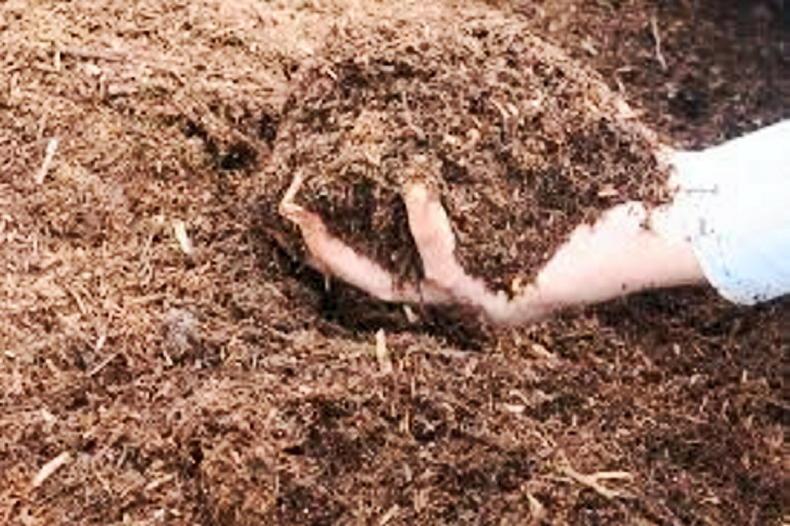
Composting is, in its simplest form, the microbial decomposition of organic material, done under conditions with air (aerobic). By composting we are trying to speed up natural decomposition. We are providing the ultimate environment for bacteria and fungi to access oxygen, water, and nutrients so they can turn our horse manure into top-quality compost.
The heat produced through the decomposition process destroys weed seeds, fly larvae, worm eggs, and other disease-causing pathogens too, it’s win-win.
If composting sounds like an option for you, then aeration is key. For smaller operations you can add air to your compost pile by turning it with a tractor. There are also static systems, which force air into the manure pile using a blower but these tend to be better for much larger operations. Now to get started!
HORSE Sense has put together a step-by-step guide to composting based on the advice of expert soil scientist, Caitlin Price Youngquist.
Location, location, location
First thing is first, you need an appropriate composting site. Choose an area with year-round easy access that’s convenient for chores. Pick a level, well-drained spot far from waterways or wells, so any run-off doesn’t contaminate surface or groundwater.
Bins or piles for your system?
A bin system basically helps keep things neater and easier to manage. Bins can be made with straw bales, pallets, treated wood or ecology blocks (stackable concrete).
You usually need at least two to three bins or piles
You can construct multiples of any of these stages or piles. To compost and generate heat, each pile should be the approximate size of a washing machine.
Keep it covered!
Covering with a tarp, plastic sheet, or a roof during the winter prevents the compost’s valuable nutrients from washing away and causing environmental problems. It also keeps compost from becoming a soggy mess in the winter and crispy-dry in the summer.
Get air into the pile
The simplest way to provide air is to use a tractor to turn the pile. If the compost is starved of air, it will become foul-smelling rather than earthy. How often you turn it determines how quickly your compost will be ready to use.
Keep it damp
Compost should be about as damp as a wrung-out sponge. In the summer, find a chore-efficient way to water your compost, either with a garden hose as you turn the pile or by hosing down the manure and stable waste daily before dumping. Compost should be damp but not dripping.
Monitor the heat
The heat the beneficial microbes generate can cause the pile to become fairly warm - about 43.3 – 71.1 °C. To kill parasites and pathogens, compost needs to reach at least 54.4°C for at least three days.
You can monitor temperatures easily using a long-stemmed compost thermometer - you can get these online easily or purchase at a garden centre.
An increasing temperature means that the microbes are working for you and doing a good job. When the temperature goes down, that’s the sign that you need to turn and mix the compost. After turning several times, if the temperatures stay low, that indicates you are moving into the curing phase and out of the active composting phase.
Curing compost
This is when the finished compost sits and stabilises. Worms and small insects move in and break it down further.
In the curing phase, cover the compost with a tarp to prevent weed seeds from blowing in and colonising your compost. Compost piles can cure for a month up to a year; the longer it cures the more stable it becomes, and the less likely that nutrients will leach out at the first drop of rain.
How actively you monitor your pile’s air and water and how frequently you turn it determines how quickly it will finish. It should take around three months, perhaps longer in the winter when microbial activity slows.
You will know your compost is ready when the material looks evenly textured, crumbly, dark-coloured like dirt, and is earthy-smelling. Its temperature should be 32.2°C or less.
Putting the compost to work
Use a manure spreader or a shovel to spread it on pastures, lawns or gardens during the growing season. Spread it in a thin layer, about a quarter to a half inch at a time, and no more than three to four inches per season in the same area.

SHARING OPTIONS: